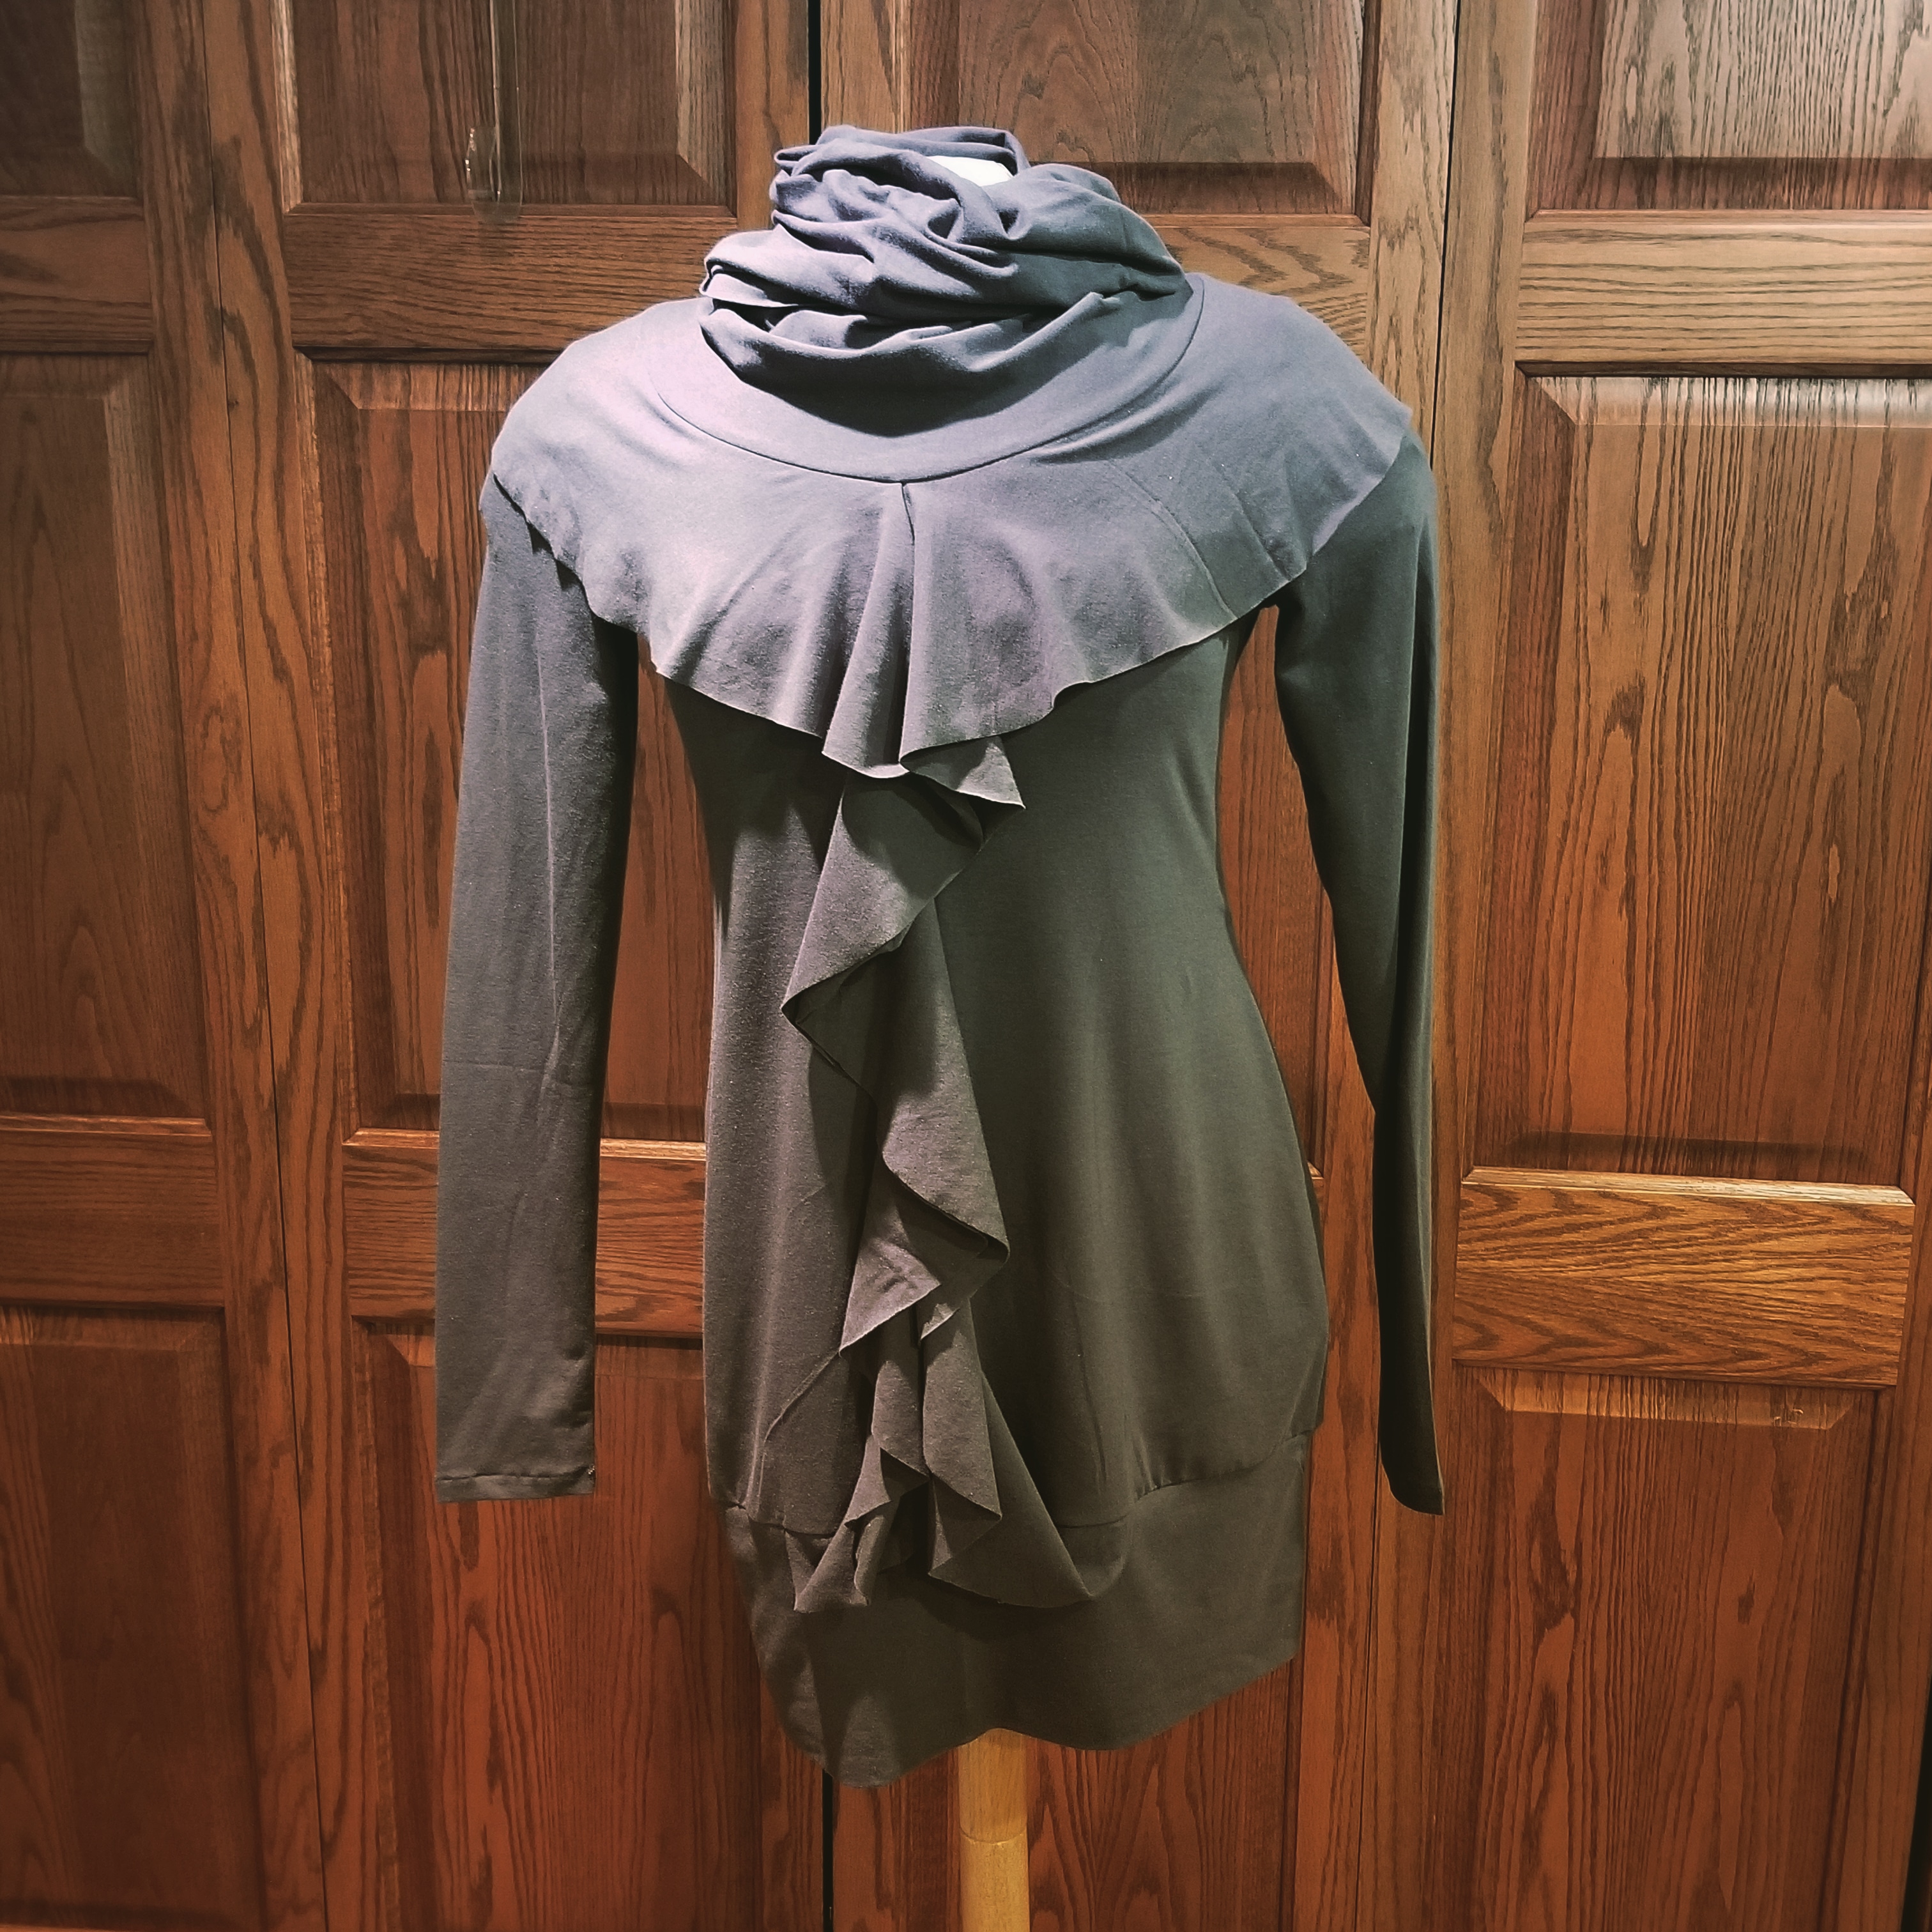
I wanted to make a nice neutral tunic top, so of course, I went over the top with the details. As I was cutting it out I was wondering if I should have made a different neckline, but I really like how cozy this is with the funnel cowl on it.

Details:
Pattern used for this pattern hack: Wardrobe by Me Basic Builder Shirt, boat neckline.
Fabric is the Dark Shadow color of Bamboo lycra jersey from Nature’s Fabrics.
Added to the pattern (I did a size 14):
- Cut the front and added a seam allowance
- A flounce that goes down the front and around the neckline to the back
- A single layer funnel cowl to the neckline (13″ on fold and 22″ long)
- A band to the bottom (5″ x 19″ on fold for both sides – so 10″ x 38″)
How to make:
The additional pieces that need to be cut are the flounce, band and cowl. The measurements I used for the band and cowl are noted above and the flounce pattern piece is linked. There is a 1″ overlap on the two pages for the flounce.
Steps:
- Cut the circle flounces and connect them together on one end.


2. Lay the front pieces down with right sides out. Put the flounces against the edges and make sure not to stretch them out. I also made sure once they were laid out that they matched around the front and back neckline. They did. Next, you sandwich the flounces between the shirt fronts, right sides together and sew up to the edge.


3. Sew the shoulders together.

4. Place the flounce around the neckline. You might have to let the seam out a little bit where the sewing ended on the neckline to get it to lay flat.


5. Sew up the long seam on the cowl and make sure the ending edge has the seam locked so it won’t come undone. Now, add this to the neckline, with the seam on the outside. This will be rolled down, so if you have the seam on the inside, it will show. Sew up the neckline seam with the cowl and flounce attached.


6. Sew the arms on, sew up the side seam and hem the sleeves.


7. Sew up the side seam of the bottom band. Fold in half and mark the 1/4 points. Place the flounce bottom edges against the hemline and then attach the band, placing the 1/4 marks at the side seams, mid front and back. Sew up the seam.


All done!


Thank you so much for sharing this!!!!!
You are very welcome! I hope it is helpful!