Leather tassels on purses can be a great accent. They can go on the zipper, or just hang off the handle. I also use these for my keys. I tend to have large purses, and it is much easier to find my keys when it is attached to a bit of fringe.
This is how I make these leather tassels, though, I am certain there are many other ways. (Yes, my cutting mat has seen better days. I tend to do multiple crafts on it, and it gets a bit messy!)
- Cut out a piece of leather. You can roll the leather to figure out how thick you would like the tassel. Some leather is thicker than others, so it will be larger when rolled. This piece is 6″ long and 13″ wide. I usually cut somewhere around 10″ wide. The length, again, is personal preference. I sometimes keep the natural edge of the hide. I do these for two reasons.
- One: I don’t like to waste the leather.
- Two: It’s an interesting edge.
This piece sat next to an oil tanned hide, which leached into this one. The discoloration will look fine on the tassel.


2. Next, you need to take a straight edge and a rotary cutter to cut the fringe. I make them roughly 1/4 inch apart, and stop it at 1.5 inches from the top. You can use a scissors, but rotary cutters work really well for this.


3. Now that the fringe is cut, you need a little strap for the top. This is around 1″ x 4″. I just rough cut the length to make sure it is long enough to go into the fringe.

4. Using a glue (here are two options), spread the glue across the entire top piece. I used a bit too much on this one. You could also use something like a school glue, too, if you don’t have access to these.


5. Place the top strap at the inside edge, and tightly wrap the fringe. Make sure the top is even as you wrap it. The glue leaked out a bit on this, since I went a bit too aggressive with it.


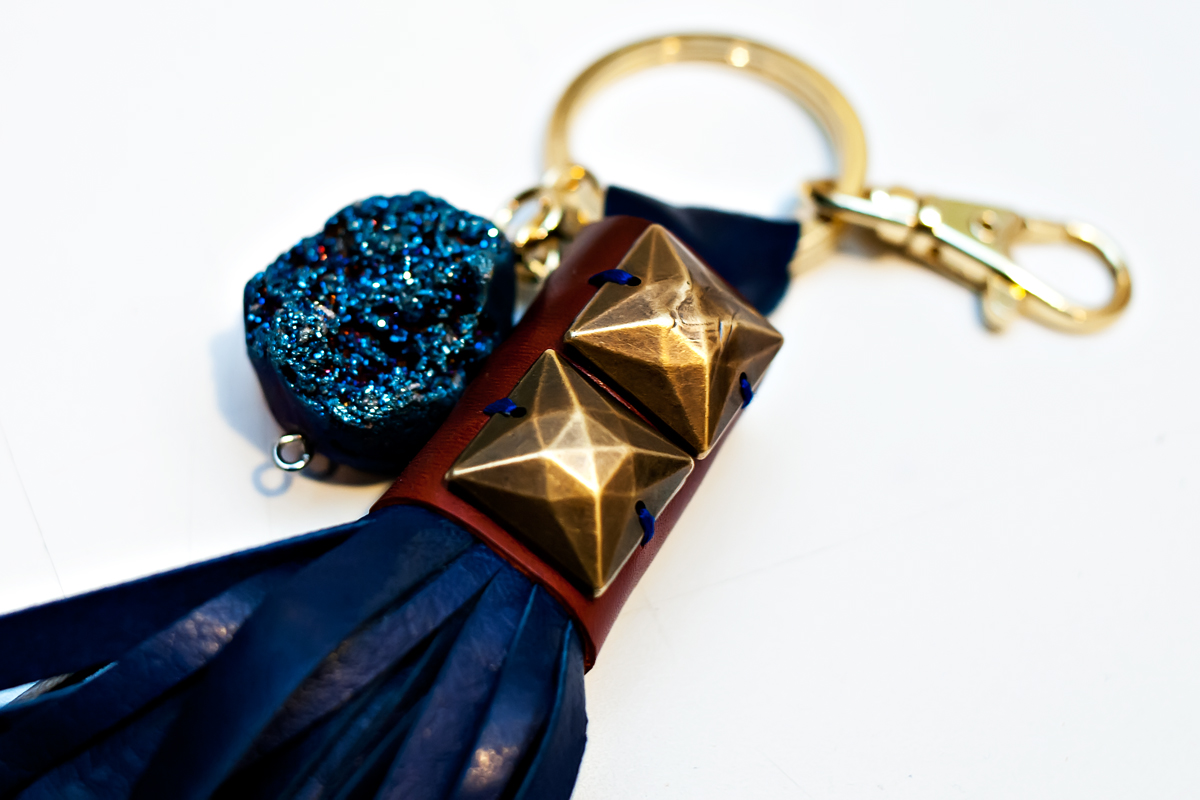
6. Next, I put a contrast leather around the top piece. Cut to size. I suggest cutting a little wider than you think you will need. This should have been a smidge wider. I added some “bling” to dress this up. You can also add decorative rivets.


7. Sew the contrast piece to the top. Generally, I want to have to stretch it to fit, so it fits tightly.


8. Add a split ring and snap to finish it off. Usually the snap piece needs to be wide enough to fit over a purse’s hardware. I also had purchased some odds and ends on clearance at Michaels, and this stone worked perfectly!
 Now you have a lovely fringe for your purse or keys!


