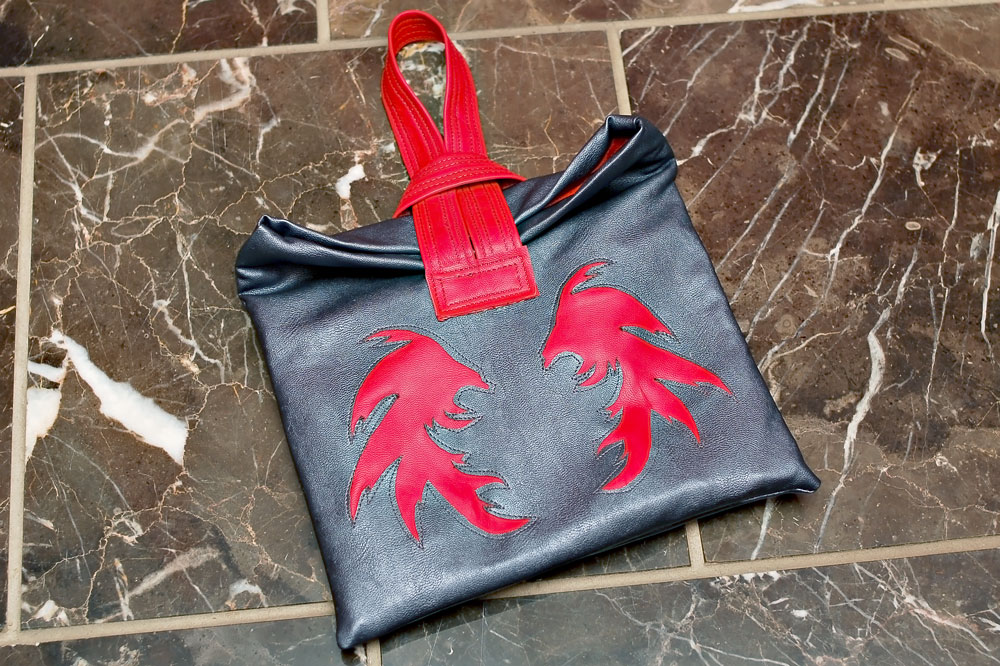
So, I kind of love this little bag. I love the leather, the motif and the design.
This is a tutorial on how to do this type of bag in leather. It would be much easier to make it in another heavyweight fabric, so go ahead and use what you have. As for the reverse appliqué, if you don’t use leather or another non-fraying material, you would need to seal the edges or stitch over them. Or just don’t do an appliqué, and this should take you less than an hour to make it.
For this clutch I used a fairly lightweight lambskin (red), Perfection Fused Leather (gunmetal gray), silk lining (red) and fusible fleece interfacing. If it were a heavier leather, then I would not have used the interfacing.
If you like the design on it, I actually saved this one, so here you go (click on it to make it bigger):

You can click on any picture to make it bigger. This is pretty picture heavy, so I didn’t want to make them too big.
Dimensions for cutting:
- Outer material: 10″ x 11.5″
- Lining (and interfacing if you need more structure): 10″ x 9.5″
- Front strap: 2″ x 18″ for leather, 4″ x 18″ for fabric
- Back Strap: 2″ x 15″ for leather, 4″ x 15″ for fabric
- Patch: 1″ x 2″ for leather, 1.5″ x 4″ for fabric
Recommended:
If sewing with leather, a teflon foot is great to have. In this case, I was using an old Singer 401A machine with a narrow foot and it didn’t seem to grip it too badly. If you have issues, tissue paper can also help the foot along, or you can use a walking foot. If sewing leather, get a leather needle, too.
Process:
1. Cut out the materials noted above. If doing an appliqué continue below, and if not go to Step #7.


2. Cut your applique design out of Heat N’ Bond (or similar material). Cut around the design so that is has about an inch or so around it.


3. Adhere HnB to the back of the front leather piece. I use a press cloth and light iron. You want it on low heat and do not press too much. If you do you will have an indention in the leather of the iron.

4. Now cut out the design. I tend to use both an exacto knife and scissors. Make as clean of cuts as you can. Peel off the paper after you have it completely cut out.


5. Cut out another piece of leather for the back of the appliqué. Adhere it to backside of the exterior piece with a light iron and press cloth.


6. Now stitch around the design to make sure it doesn’t come loose. Do not backstitch on leather to secure the ends. Leave enough of a tail that you can use a needle and thread it through to the backside and tie off the ends.


7. If working with leather on the straps, I fold them towards the middle. Put some glue on the interior and it will stay in place while stitching it down. I also pound it flat with a hammer. This is a really soft lambskin, so I added a ribbon down the center to keep it from stretching out. If using regular fabric, then fold both towards the center and then fold that in on itself, so you have 4 layers to stitch through. This will keep the edges inside and you won’t have to deal with it fraying.


8. Stitch down the straps. Put as many rows of stitching as you like. With leather I do the edges and then next to the middle to keep it together. With fabric you would just need to do the edges.

9. Place the straps in the following positions: Front exterior – go down 5 inches from the top. Back exterior – go down 8 inches from the top. I put down a little glue to keep it from shifting too much. Place the little patch of leather of the top.


10. Stitch it all down. If using fabric, fold the edges under and stitch it down.


11. Sew together the sides and bottom edge of the exterior pieces. Clip the corners.

12. Sew together the sides and leave a hole in the bottom for the interior pieces. This is where you will pull the pieces right sides out, so make sure it is about 4-5″ wide. *If using interfacing, make sure to adhere it to the lining before stitching.


13. Push the exterior right sides out, making sure to poke the corners out. Place the exterior right sides into the interior with the wrong side facing out. The right sides will be together. Clip in place and stitch around the top.


14. Pull the exterior through the hole.

15. Now stitch across the hole to seal it up.

16. Push the interior inside. There should be about an inch where the exterior goes down into the inside. If it shifts too much, you can stitch in the ditch on the side seam to keep it in place.

Done!


