I decided I wanted to try tooling some leather, so I started following a Facebook group for leather crafters. They impart some great tips and show their work. I was inspired to start creating something after a few months, so I got a basic tool kit from Tandy Leather, some vegetable tanned leather, and got to work.
The first attempt at using my tools was eye opening. This is not as easy as it looks. You pull the tool along while tapping it with a mallet. If you don’t pull it smoothly or tap with consistent depth the marks are different.
After I kind of got it figured out, I attempted the green pair. First, you cut out the leather, then you get it wet (like submersed in water), allow it dry enough so the water is absorbed and then you start tooling. The leather needs to be moist while you are tooling. Once done tooling, then you allow to dry and add your paints and dyes.
For the green one, I first made the loom beaded pieces, so I would know the size of space to cut out. I cut out the space exactly, and used the cut out piece to glue the beads onto using E6000 glue. In order for it to be as flat as I could make it, I need to shave down the pieces of leather that had been cut out. I only sliced myself with the exacto knife twice. 😉 Once the glue is dried, then you put the puzzle pieces together and glue them in place again.

This was definitely a learning process. The beaded pieces were put on after the leather was dyed and painted. Then the thinner green lambskin was glued onto the back. I tried to machine stitch them together, but the tension was really off. I pull off those threads and hand stitched the straps.

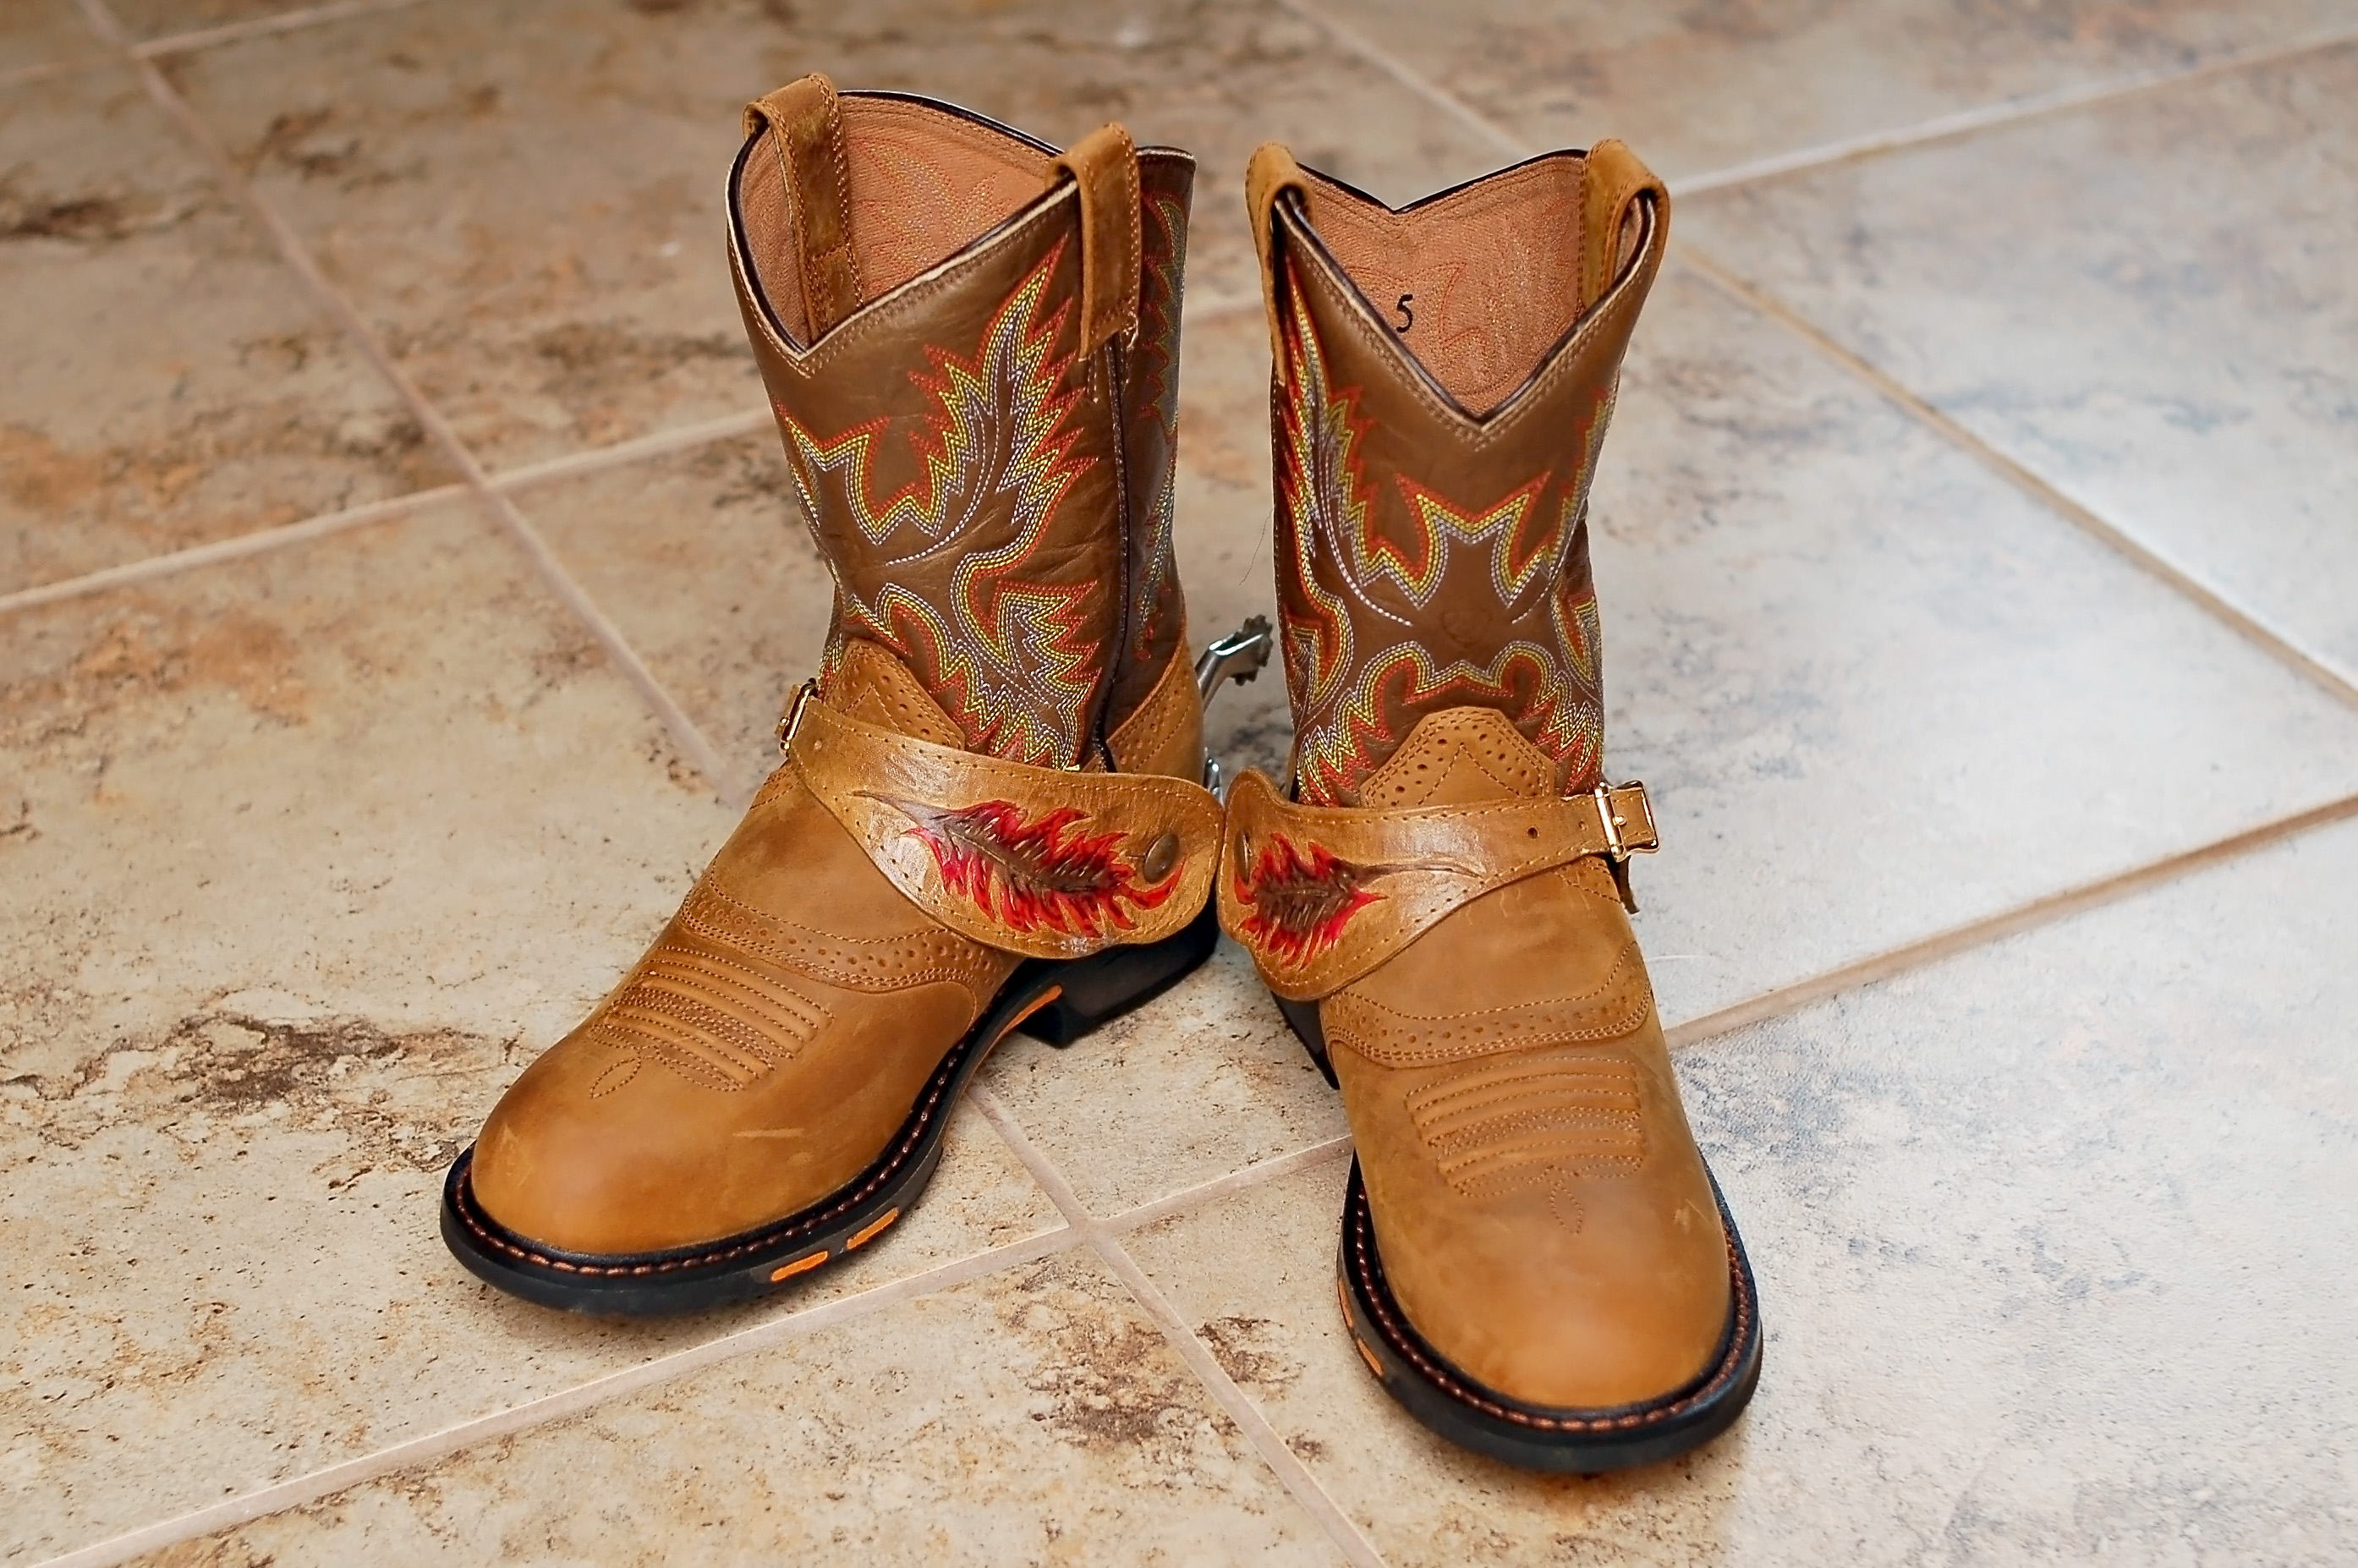
The feather one was much easier. I drew out the design, which you can find here if you want it. I just outlined it and then put in marks for a feather. I had a really small background tool, so the tool marks are easy to see, unfortunately. No one should be looking at her feet that close, though.
I dyed the feather part first, and then tackled the background. You have to use a really small brush to get the detail work and in the little nooks and crannies. I think these turned out pretty nice, too, though the buckle on this one is harder to do since it is thinner.
After it was all dried, I stitched it on the machine. The machine stitching still wasn’t great, but better than the thicker one above. The stitching helps keep the leather from stretching out too much.

I put the buckles on with this screw. I didn’t have enough room for stitching and this was the easiest I could find. Next time, I will have to make the end piece longer. It wasn’t quite long enough here to make putting on a buckle easy.


So there you have it.
I gave these to my sister for her birthday, along with one of the beaded leather bracelets I made. I would like to delve into more tooling, but this is definitely not easy. If you see a nicely tooled piece of leather, know that a craftsman did that, and it took many, many hours to get it to look so nice.


