Who needs more drama, amiright? There seems to be enough in the world today!
In an effort to stop watching the news and the unfolding angst in my Facebook feed I decided I needed to get into my sewing room and use up some of that fabric I have been hoarding.
Self care right here.
This came about from some inspiration photos on Pinterest. I still peruse Pinterest quite regularly and any clothes I come across with interesting details I put in my “Clothing details ideas” folder.
These were a few pictures I pinned that interested me in their cape designs. Basically I wanted to make a jacket front with the cape piece for the arms that attached at the front collar.


As always I needed to start drafting from a base pattern. As I only have so much time in my day, this time I chose the Wardrobe by Me blazer that I had made previously. I knew it fit and it is a very nice jacket to wear. I modified the front welt pocket and arms. I took out the welt pockets, since I wanted the front line to be clean and not droop open where the pocket was. I didn’t include sleeves, so I added a facing to the armsyce and, of course, added the cape.
This was not a one night project.
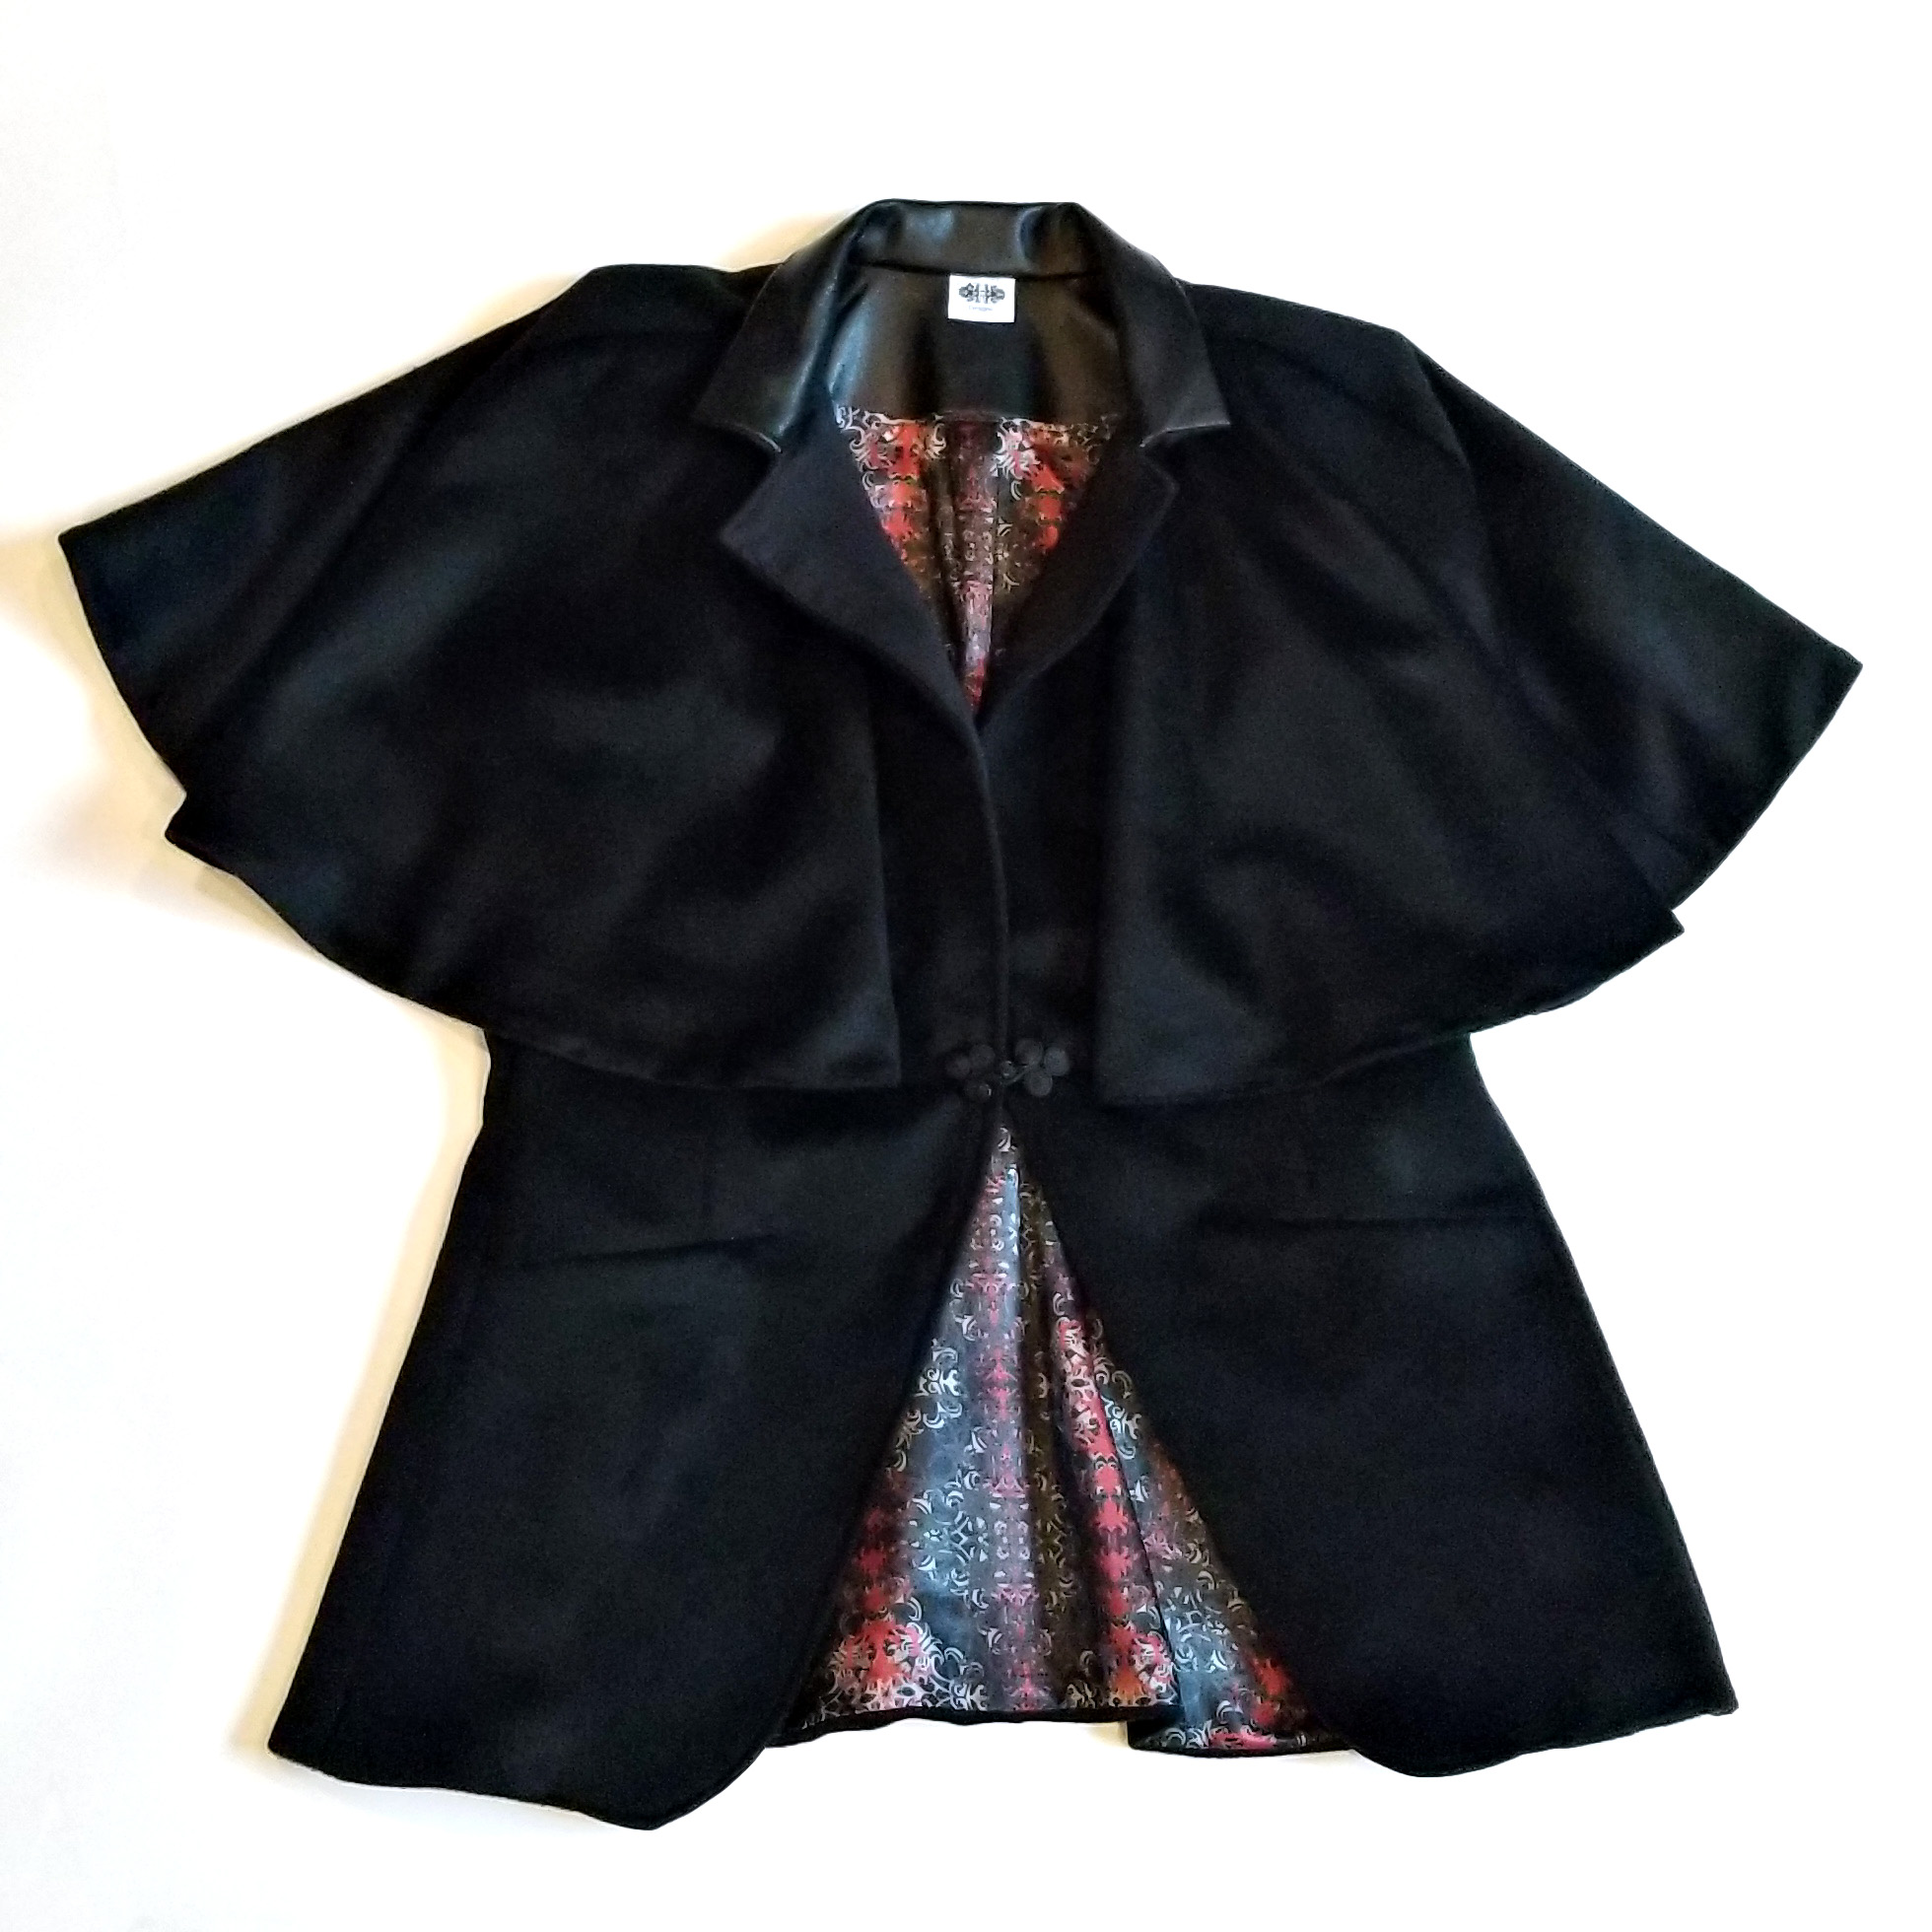
The fabric I had hoarded was 2 yards of a black faux fur with a laid down nap. Just the kind of dramatic fabric you need for a drama cape. The lining I used was a satin in one of my designs. I didn’t have quite enough fabric for the facings, so I used a black broadcloth for the facings, and the collar is leather.
I, of course, had not planned well, so I had to wait on the satin fabric. That was fine since I had been working long hours and knew this was going to be long drawn out project.

There were A LOT of pieces for this cape, as it is fully lined. I didn’t do all of the interfacing in the pattern, but I did most of the interfacing.
This is a project where tackling it a little at a time is the best option to not get burned out. I cut it out on Sunday afternoon and applied the interfacings, and then worked on it during the week.
- Monday: I did the middle back lining pieces and then the cape, lining and facing.
- Tuesday: I tackled the outside; darts on the front piece and attaching all of the front pieces. I forgot to attach the cape at the collar, so I had to seam rip and put that on, only to realize that the topstitching I did on the cape needed to come off since it wasn’t laying right. *sigh*
- Wednesday: No sewing – it was the boy’s birthday.
- Thursday: Seam ripping the topstitching.
- Friday: Hand-sewing the cape hem, instead of machine top stitching. Less stitching showing on the edge.
- Saturday: Finishing it up – took a good 5 hours. Facing and inside finished. Collars attached. Now, the hard part. I needed to figure out how to attach the lining at the arms. One method is to not do the side seams, attach front and back at the arms, and then do the side seams. That would not work here, since the outside and lining are different pieces and don’t match up. I had to do a bit of creative pinning to do the arms, but got it to work. Then the bottom hem, which I left a hole in to turn the jacket, and hand-stitched that close. Lastly was the little closure that I handstitched on. The cape is a little tight right now, so hopefully in the future when I lose some weight I can move that in a bit more. The nice thing about moveable closures versus a button and buttonhole.

Pictures of it all pretty and finished:


Hey, look at this! I actually took pictures of me in an outfit!
It doesn’t fit as well as I would like for two reasons: 1 – the pattern is written for knit and 2 – I used the pieces I had cut out a few years ago when I was a bit lower in weight. It is good enough for how I want it to fit, though.


I also had some issues with some pieces not fitting together so well, but I am fairly certain no one would notice but me. If I do ever do this again, or some derivation of it, I need to slash and spread the back part of the cape pattern to give the back more fabric. It fits pretty straight there, as I didn’t do that in that area. I had to hand-stitch the front pieces to the lining, too, otherwise they stuck out too much.

On to the next Pinterest-inspired project!

