There are times when I am just not interested in lugging my purse around. In these moments, it is nice to have a hip bag that I can put my phone, keys, etc. into and free up my shoulder from the burden of my overstuffed purse.


There are TONS of inspiration and ideas on Pinterest for these waist belt/pouches. Some are fairly extravagant and can hold a lot of stuff. I decided to make one based on a hip bag I made previously.


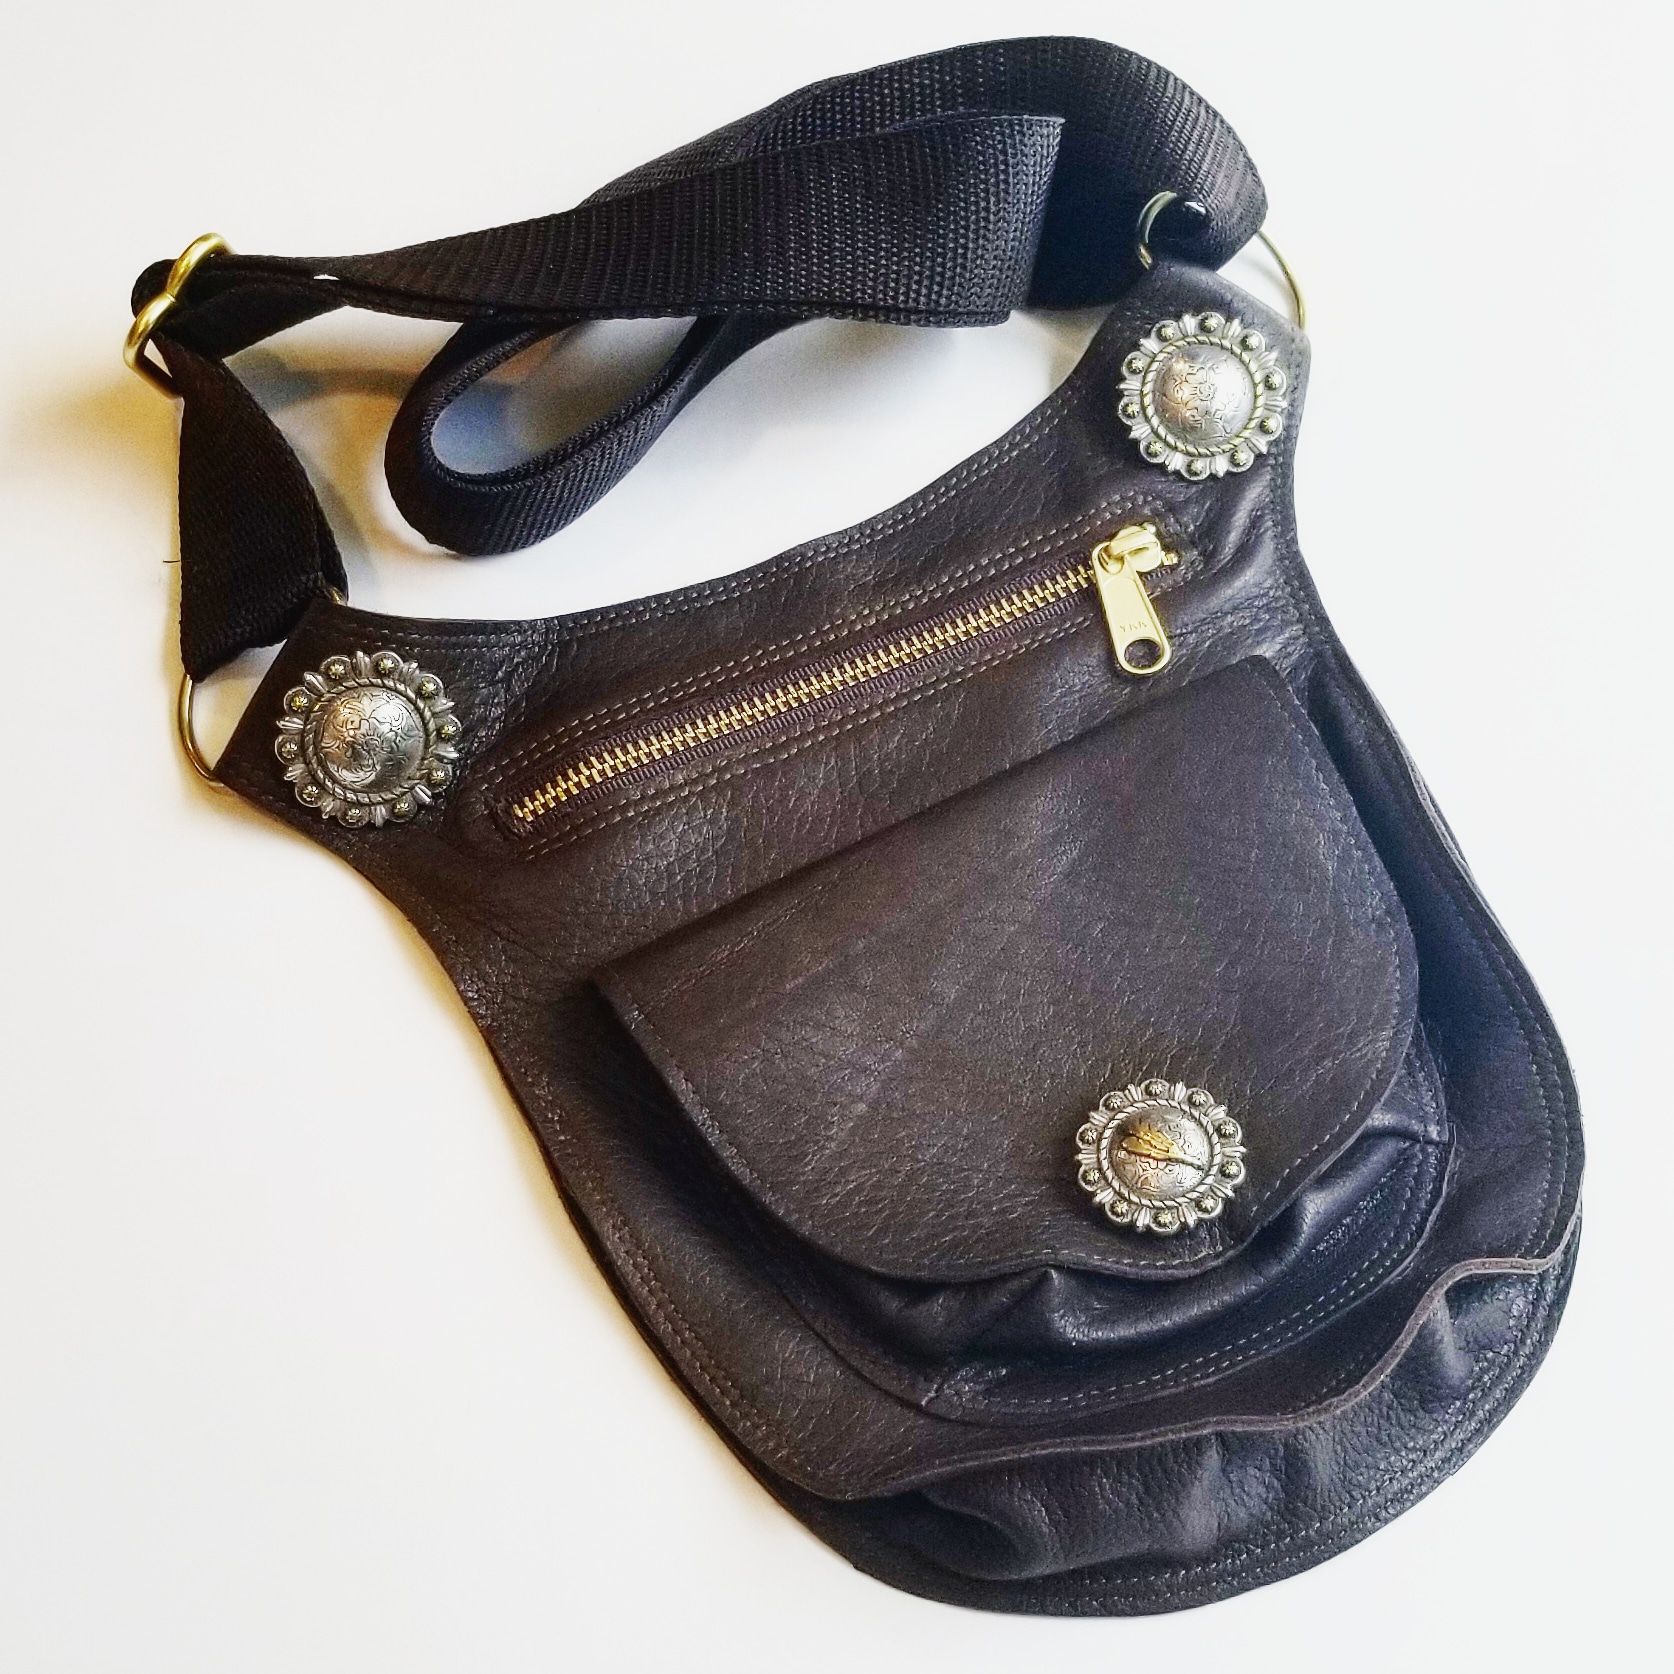
Using the base pattern, I added another pouch on top of the initial top layer. I added darts into the side seams to make it go outward for more room. I added a flap over the top of the pocket.
When carrying this, here is how I use it.
- Wallet and phone in the zip pouch close to the top.
- Keys and lipstick in the pouch on the front.
The pattern is here. The layout of the pieces should look like this:

Here is a blog post I put together on sewing with leather, different leather types and tips from my experience.
To cut the pieces from the leather:
- 2 pieces of the body
- 1 piece of the outside pocket, plus a 1″ strip along the top
- 2 pieces of the flap
- 1 gusset piece
- 1 – 6″ zipper
- 1 – 54″ strap
- 1 – Slider
- 2 – post-snap, concho, rivets, etc. to fold over the pointed ends
- 2 – D-rings or circle rings – at least 1.5″
- 1 – magnet snap, post snap, or other closure
- Wondertape and/or glue

From the supplies list above, you can use whatever hardware you want to make it your own style. I prefer to use magnets over post snaps for the flap as it is easier to close. I have also used different closures I have found at Tandy Leather. If you use a magnet, you need to line the flap in order to hide the fold over back of the magnet that would be visible on the top of the flap if there is no lining. I have done it with no lining on the red one, where it was hidden in the top decoration.
For glue, I use a product that comes from Tandy Leather, which is a contact adhesive. It works really well to hold everything together.

Process:
- Cut out the zipper opening. Carefully! This will be visible. You can cut out the opening from the pattern piece, flip the leather piece to the backside and mark the opening. Carefully cut it with an exacto knife, or scissors. I find an exacto knife and a straight edge give the best result. Make sure you meet the cuts at the corners and don’t go over.


2. Use Wondertape to place the zipper in the opening, noting your preference for which side you will wear the purse and which direction you want it to zip. If using a metal zipper, I will hand-stitch it at the length I want, cut it off and take out the extra teeth. This helps in not having to worry about hitting the zipper with my needle. Stitch around the opening.


3. Sew the triangles in the corners of the top pouch. With a thinner leather, fold right sides together and sew close to the edge to join them. If the leather is thicker, you may need to place holes in the leather with an awl and hand stitch the sides together in an overlap. The white pouch above is done in that manner.


4. Place glue on the pocket facing, glue down with matching the edges and sew on the top and bottom.


5. Place the magnet, post snap or closure on the outside pouch and the flap top. I will generally mark the placement of both on the front of the purse, and then gauge where the closure will meet. I have generally placed them about an 1/2″ to 1″ above where the dart is placed in the bottom corners.


6. Put Wondertape or glue along the edge of the outside pouch. Place it evenly on the front, an inch from the edge. I start at the bottom middle and make my way around, making sure they end up with the opening at the same spot. Sew this down. I do two lines of stitching, but if one seems secure then go with it.


7. Mark the center of the flaps (I usually just fold over and press flat) and mark it 1.5″ up from the edge. Place your magnet on the inside flap and the concho on the outside flap. Feel free to add an extra leather piece to either if you feel it needs additional support (I did that on the inside of the pouch). Put glue on one of the sides, and glue the pieces together. If they don’t match exactly, trim the edges. Sew along the outside, close to the edge.


8. Place the top of the flap against the edge of the pouch opening with Wondertape or glue to keep it in place (yes, I use this a lot). Make sure that the magnets meet up well, otherwise you may need to move the top flap around. Sew this down.


9. Mark the center of the gusset on both sides and center of the front and the back of the main purse. Put Wondertape or glue on the gusset and place on the front edge, making sure that they end at the same spot on each side. Stitch down the front first and then the back, within a 1/2″ of the edge of the gusset top.


10. Finish stitching the rest of the front and back together, pushing in the gusset, adding glue to the top, and stitching it down about 1″ into where the gusset ends, enclosing it in the seam (ignore my messy fingers – the glue tends to stick to everything).


11. Decide on your closure for the strap. Fold over the ends about 2″, and determine where to put the closure. I mark the spot with the concho by pressing down and then pushing an awl through both sides. I use my hole punch to put in a bigger hole that the concho will fit through, but make sure it is a tight hole or it will pull out.
Put the d-ring in the folded over edge and then put in the concho. If you are using post snaps, just add them to each side that is marked and then push them together to close. If using either post snaps or screw back conchos, you can open and close the opening. This can be helpful if you want to attach this to a belt or belt loops and take off the strap.


12. For the strap, I heat seal the edges then sew down one end to the d-ring. On the opposite side, thread it through the separator, then the d-ring, and then back through the middle of the separator. This allows you to be able to adjust the length to a cross body bag, or you can put it around your waist. Make sure to test that there are no twists in the strap before you sew it down.


All done! Go forth and use your fun new bag.


I love it! I am very visual….great job with the pictures and explanation….thank you.
You are welcome! Hope the tutorial is helpful. 🙂
Did my pattern piece print out right – do you have to tape page 3 and 4 together?
Hi Gwenna! I updated the post with a picture of what the layout should look like. If your printer doesn’t print to the edges, there may be a layout issue. I am new to this, so not sure if it will print correctly for everyone. Let me know if you are having problems and I can try to figure out how to do it differently.
What leather did you use for this bag? I am not sure what to buy. I have a pretty strong metal gear domestic, but not an industrial machine.
Hi Audrey – I used deerhide for this one. I mostly use lambskin, pigskin or deerhide for these. A regular sewing machine should be able to sew through them. See my blog link that I have above on sewing with leather. That gives some tips.