I go between wanting a big purse and NOT wanting a big purse, but alas…my life needs a big purse. During the week I tend to bring work home with me at times with the best of intentions (spoiler: it rarely leaves my purse). On the weekends I generally have a tournament or two that I need to go to and tend to bring my DSLR, an extra lens, snacks, water bottle, possible hand craft project, etc., etc.
So, yeah…need a bigger purse. I thought a backpack one would be easier on my back in case I need to hold it a lot.
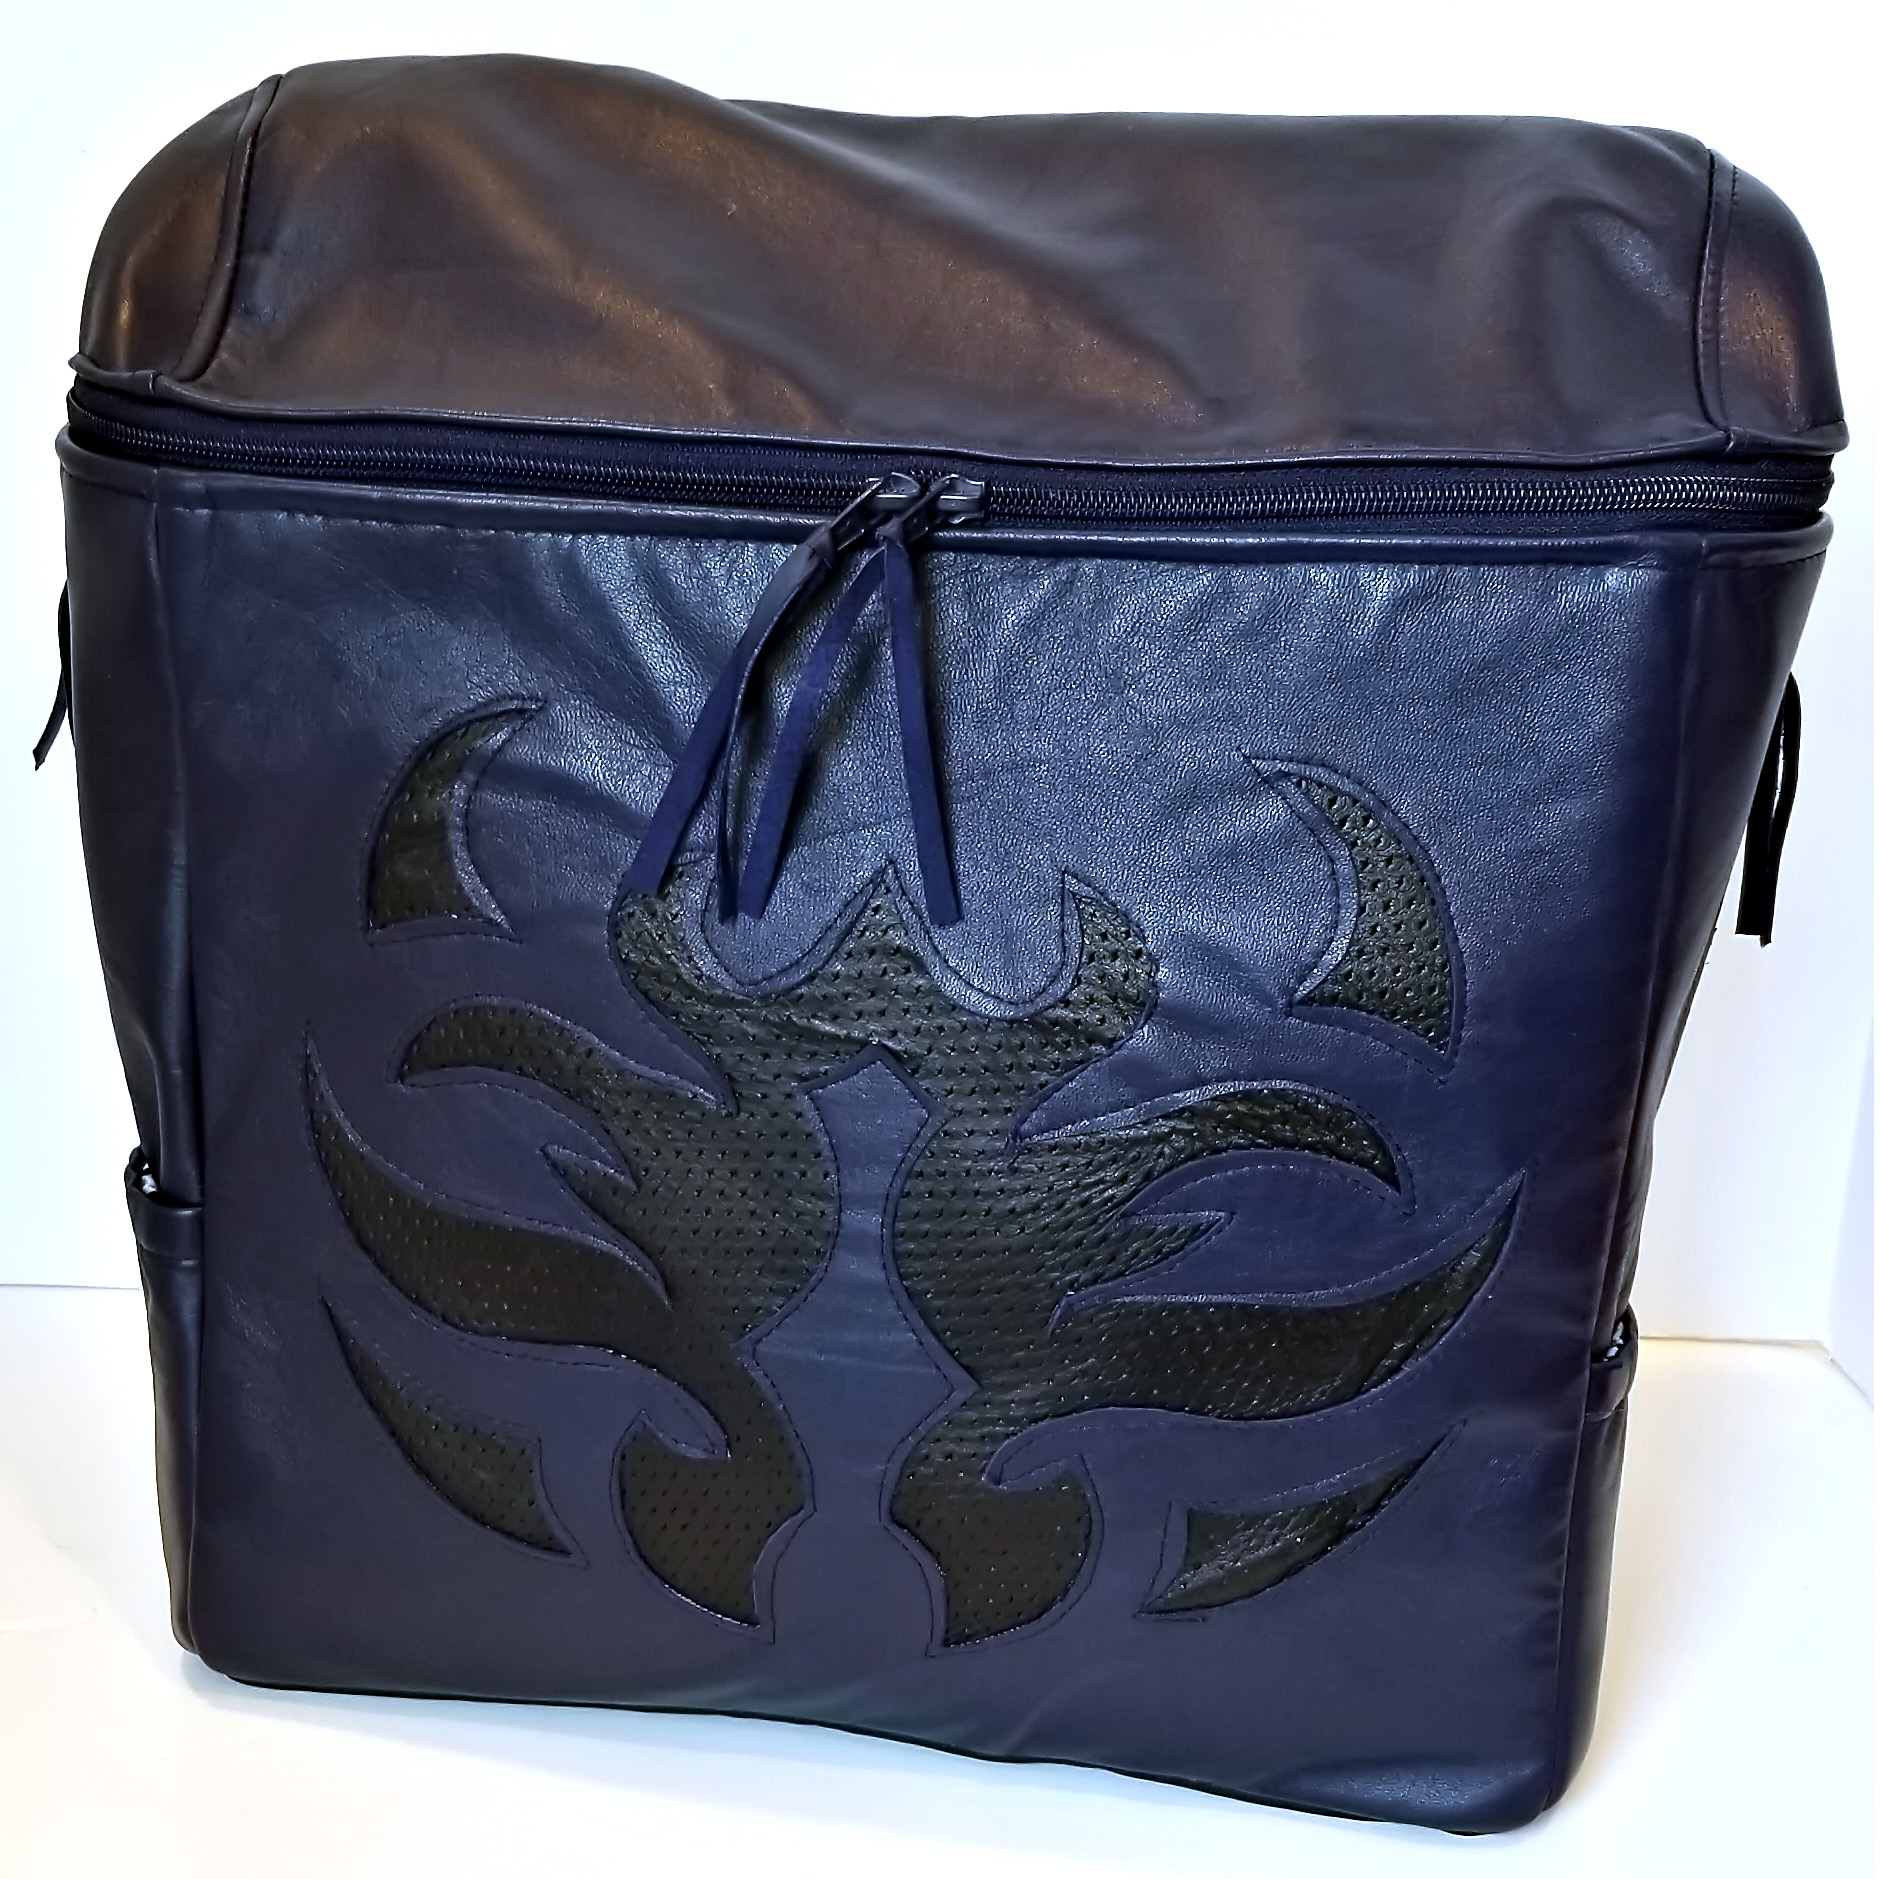
I did my typical “search through all the pins on Pinterest” and ended up with this design for my backpack purse:

Design features:
- Zipper pockets on each side that go down to the bottom.
- Water bottle pocket on each side, or just an open pocket to throw the keys or phone in when you don’t want to bother with a zipper.
- Laptop pocket in the back
- Applique on the front
- Convertible straps so it can be a backpack or shoulder carry
- Horizontal zip top
- Inside is padded with foam interfacing
When I start drafting a pattern I usually have one idea in my mind, but it tends to morph a bit. That happened a bit here. I was going to do a front pocket, but just decided to do one of my designs on the front.
I knew this was going to be thick, so a complete PITA to sew on my machine. Luckily it was lambskin, so while lots of layers of leather, the leather was thin. I also interfaced pretty much everything, including the leather, to keep the leather and fabric from stretching.
The lining fabric was a twill with a slight stretch. I had purchased it for apparel, but it has been sitting there for about 10 years, so time to use it up!
The longest part is generally cutting all the pieces. I had two navy lambskin hides, and used most of them up on this bag. They were a pretty close match, so the variations in color shouldn’t be too noticeable. I made sure to cut the matching front, back and sides on the same hides.

I tend to cut the main pieces out, and then figure out the inside pockets and straps as I go. Not the most efficient way, but it works.
A new leather needle is a MUST before starting a project, or else you get skipped stitches. For more information on sewing with leather, see this blog post.
Step 1: Applique the bottom front of the bag. I use Heat n’ Bond for the applique, so it will seal the two leathers together and then I stitch around the applique. It will pull loose eventually if you don’t stitch around it. It is a bit tedious and you need to take your time or it looks bad.


Step 2: Side pockets. I general cut the opening in leather pockets for the zipper instead of trying to turn it under for a folded seam. You may end up with too much bulk that is a pain to sew. I do fold under the seam of the lining fabric, though. I try to sew it all at the same time, so I tend to use a lot of Wondertape on these openings.


Step 3. For the open/bottle pockets, I put elastic in the top of the seam between the leather and the lining fabric. This is to keep the leather from stretching out over time.


Step 4: Lining pockets. The lining needs to be finished up next before assembling the rest of the pieces, so here is where you decide on what type of pockets you want on the inside. More pockets is always better in my opinion! I tend to at least put some open pockets with places for pens, that also fits my phone and my sunglasses. I generally just cut a long folded over rectangle that is less than the width of the lining piece, and then stitch up the different sections. If you want a zippered pocket, I will usually do one of those. As it is on the inside I don’t worry so much if the zippers match the ones on the outside.


Step 5: Stitch the front and the sides together.


Step 6: Main zipper. In this spot, I do the bottom pieces and then will do the top pieces. You need to make sure you mark the middle and the seams for the zipper placement on the top and the bottom of it so that when zipped up everything matches up. Otherwise, I can pretty much guarantee you won’t be luckily enough for that to happen. I use Wondertape to place my zipper and to make sure nothing moves out of place.


Step 7: Back of the bag. In order to maximize the usage of the leather, I made the pocket in the back of the bag have the lining fabric where it would not show. I cut the pieces a little bit wrong for the back initially, but I was still able to use them. Here I also wanted the pocket to have foam in it as it is for the laptop. It needs that padding to protect it.


Here is where you need to place the straps for the bag before finishing up the bag. I make sure that they are solidly in place as they take a lot of abuse. If the leather is really thin, interfacing is a must, but you may also want to add another piece of leather behind it and definitely extra rows of stitching. FYI – Straps on perforated leather is badddd. I have an unusable bag now because of that.


The straps can be made a bit more durable by placing some twill tape or grosgrain ribbon in between the leather layers. It helps to keep them from stretching out, as well.
Step 8: Sew front and back together. Sorry, no more pictures. Here is where I started to lose steam and get frustrated from the sewing machine skipping stitches. It was pretty thick so it does get harder on the machine. I messed with the presser foot pressure, new needles and tension.
Step 9: Sew the bottoms. This part is where it gets tricky. I sewed the leather first and then sewed the fabric, leaving a hole to turn it through. This is also where sometimes you need to pin and then turn to make sure you can at the end get it right side out.
All done!


